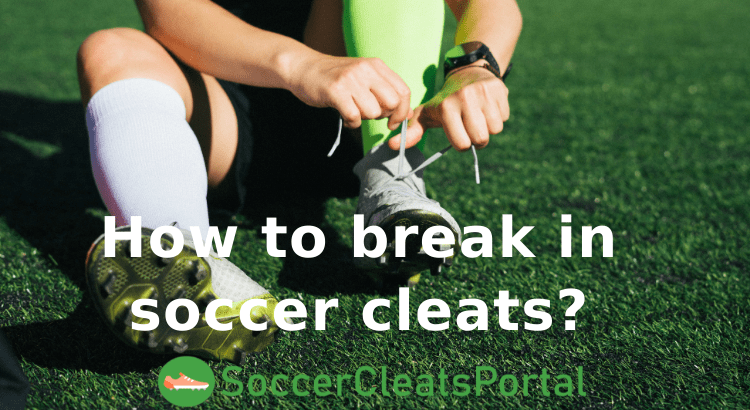
Every new shoe feels a bit uncomfortable until it gets broken in. The tight-fitting soccer cleats are no exception to this rule. You’ll have to do a lot of running in them so it’s a good idea to get your shoes into shape as soon as possible to avoid any blisters.
So, what are the tips and tricks for breaking in your soccer cleats?
- Be Careful When Choosing the Size.
- Wear Your Cleats Around.
- Avoid Intense Training.
- Decrease Friction.
- Wear Proper Socks.
- Avoid Extreme Weather Conditions.
- Lace Them Loose.
- Use a Custom Pair of Insoles.
- Dampen The Upper.
- Showering With Your Cleats On.
- The Hot Water Trick.
- Freezing Them Up.
- Use a Hairdryer or Steamer.
- Use a Shoe Stretcher.
What is the breaking-in time of soccer cleats?
Breaking-in time is the amount of time that it takes for you to essentially become comfortable in or get used to the feel of a brand-new pair of shoes.
So how long does it take for you to break in a given pair of soccer boots? Well, that’s something that will vary from pair to pair and it will also vary from person to person depending on how the shoes feel on the foot or the actual shape of the foot.
For example, synthetic cleats do not stretch as quickly as a leather boot. Also, very cheap soccer cleats will generally need more time to break-in. The highly sophisticated new modern materials used for soccer boots these days make the upper a lot softer, thus reducing the time of the break-in process.
Now that we’ve established what break-in time is in. how do you actually go about breaking in a brand-new pair of soccer shoes?
Tips on how to break-in your soccer cleats
Be Careful When Choosing the Size
This more like just good common sense but it’s always a good idea to make sure that you get the right size the right fit and of course the right width when you order new boots.
You should always make sure that you buy soccer cleats that are a good fit. Your foot should fit tightly in the shoe, however, be careful to leave your toes some wiggling space.
It’s not uncommon for a soccer cleat to be a half-size smaller than your usual footwear.
Wear Your Cleats Around
Regular shoes are broken in by simply walking and this can also be implemented when dealing with soccer cleats.
This is the most natural way of doing it. Just put on your cleats and wear them around your yard for at least 30 minutes as you do some chores or spend time with your family. Bring your cleats with you when you take a walk on a grassy surface.
Also if you realize that these boots aren’t as comfortable or don’t fit well, because you’ve only worn them around casually you will still have the option to return them. Where if you immediately go to the field and start playing and then realize that the boots aren’t really the ones for you, you can longer return them.
Wearing the shoes and getting used to how they feel on your feet is pretty much half the battle here in terms of breaking in a brand new pair of shoes.
Avoid Intense Training

So once you’ve worn your boots around the house and you decide that they’re the right boots for you you can now begin training and playing with them.
When breaking-in soccer cleats, you want to take it easy and start with low-intensity types of movements. Walking, a little bit of jogging, or passing the ball is something that you want to do when wearing a new pair of cleats.
Wearing them straight into a game or wearing them straight into a free-kick session or something like that that is not a good idea. Also, sprinting and making quick changes of direction is something that you really want to avoid doing until you start to get used to how the shoe feels.
That way you will avoid getting blisters on your feet and the breaking-in process will be smoother.
Decrease Friction
You can take some vaseline and rub it on the heels and the toe parts inside of your shoe.
This will help to lessen the friction between the shoe and your feet, thus reducing the possibilities of blisters forming.
When you are trying to getting used to your new shoes you should avoid wearing ankle cut socks or low-cut socks in general.
If your sock is sliding down to where you have bare skin, it is certain that you will experience some kind of discomfort when breaking your cleats.
Wearing multiple pairs of socks can also speed up the process.
Generally, wearing a proper pair of full-length soccer socks is a must when breaking-in your shoes.
Avoid Extreme Weather Conditions
If it’s an extremely hot day or a really cold day, it’s probably not a good time to break in your new cleats.
If it’s really hot, having all of that extra sweat and moisture inside of the shoe is going to make you much more prone to getting some kind of a blister.
On the other hand, cold weather conditions can make the shoes feel more rigid and this can make the breaking-in process more difficult.
Lace Them Loose
Another trick is to don’t tie your football boots too tight when they’re brand new.
In order to avoid potential blistering, you don’t necessarily need to tie them as tight as they can possibly go until you get used to how they feel.
Use a Custom Pair of Insoles
If you feel that you don’t get enough support and enough cushioning or in general enough comfort from the standard insoles that come with your cleats, getting a pair of gel insoles might be a very good solution.
That will help to get a lot of shock absorption and you can actually also customize it to fit the size and the width of your shoes.
You can find more info about the soccer cleat insoles in my article about the best insoles for soccer cleats.
Dampen The Upper
You can always moisten the shoe with the help of a sponge or spray water before any use.
That will help the upper to stretch a little bit.
Showering With Your Cleats On
One other, although not very advisable, way to speed up the process of breaking in your soccer cleats is to submerge them in hot water while wearing them. The simplest method is to simply take a shower while you keep your cleats and socks on. The warm water will help with loosening up the leather. You should keep the shoes on as they begin to dry. They will start to adjust to the shape of your feet.
The Hot Water Trick
This is a very popular method that is used by many soccer players around the world.
– First off, you fill the container with warm water until your feet can be submerged up to the ankles. Make sure the bucket is large enough for both feet. The temperature of the water should be as hot as it can without burning you – like when bathing in a hot tub. Don’t use boiling water or very hot water as this can damage the upper or promote sole separation by melting the glue that holds the upper and the soleplate together.
– Put on your socks and cleats and lace them up like you would before a game. Avoid wearing dress socks as they’re thinner than sport versions. Also, try not to overly tight the laces as this may excessively stretch the upper when submerged into the semi-hot water.
– When placing the boots into the water you want to submerge only the toe box and the side areas as this is what you’re looking to become softer. Make sure not to place the boot too deep into the water as this results in water entering within the boot which isn’t required.
– Use your hands to massage the sides of your cleats and squeeze any remaining air out. This will keep them as tight to your feet as possible. At the same time, you can move your toes inside the shoe as it enhances the break-in process making the upper softer.
– Leave your cleats submerged in water for some 10 minutes. If the water is getting cooler you can refill it with hot water to increase the temperature and maintain the effective breaking process. After this, you can remove your feet from the water.
– This was only the first part of the journey though. Keep your shoes on and find a grass surface. For the next 10 minutes, you should just walk and get used to the feeling of warm, wet shoes. After this, instead of going straight out onto the pitch and picking free-kicks and long-range strikes the best thing to do is try doing some jogs and ball drills first.
– After finishing that, you need to unlace the boots and take them off. If you’re breaking in leather boots this is the point where you would apply some leather care treatment to ensure the natural upper doesn’t crack from becoming wet. This will also help with the flexibility of the leather.
– This is where the crumpled newspaper comes into play as you’ll be stuffing the boot tightly with different sized pieces. This ensures that the upper remains slightly stretched throughout the drying time and this results in a softer upper outcome. Once you fully stuff the boot you’re going to tighten the laces up so that they have a natural foot shape ready to dry and soften up.
– Another trick within the process is to hang the boots on a washing line or something similar for approximately eight to ten hours or overnight before putting them on. That way they will remain slightly wet for several hours and therefore soften nicely. When putting your shoes to dry, try to avoid direct sunlight and drafty places. These conditions can dry out the leather which will shorten the lifespan of your cleats. You can find more info about the dry up process in my article on how to dry soccer shoes.
For the next two weeks, you should practice in them every day for at least 20 to 30 minutes. If you feel your feet hurt while wearing your cleats, you can put some bandaids on sore places to decrease the friction, or you can bring an extra pair and switch when it becomes unbearable. You can also put some vaseline inside as it helps with blisters and keeps the leather soft when your cleats dry. You can find more info about blisters injury in my article on how to prevent blisters from soccer cleats.
The hot water trick is an effective measure to break in your soccer cleats but you should be aware of the adverse effects that it might have in your shoes. If, for example, you soak them in very hot water for too long or you use them too quickly there is always the danger for your shoes to fall apart much quicker. So when you’re doing this trick be really aware of how long you soak your boots in the water and also be aware of the fact that you should wait until they’re completely dry to use them.
Also, this method is not very suitable for the modern age boots with knitted uppers or with other textile materials. While you can use the hot water trick on any modern football boot it’s not really going to put you at any kind of advantage as they are already flexible from the beginning. This method is more suitable for cleats that have a very stiff construction or if you do not have much time to wear your shoes casually for one or two weeks and you need to wear them immediately.
Freezing Them Up
It’s also possible to stretch your soccer cleats by using the freezer. We already mentioned heat, so how is it possible to break in your cleats with ice too?
This is an old trick and it relies on mechanical stretching. Take a plastic bag and put it inside your shoe. Make sure that the bag reaches all the way to the toe section of the cleat, and then pour water into it until it’s full. Close the bag with a knot or a zip. After this, place it in the freezer and leave it there overnight. The water will expand as it freezes up, and your cleats will get stretched
out in the process. If you have some trouble with taking out the bags, just let the ice melt for a couple of minutes.
Using a Hairdryer or Steamer
It’s also possible to break in your soccer cleats by using heat without the need for hot water.
Put on your soccer cleats and some thick socks. With a hairdryer set on a high setting, heat up each shoe for 5 minutes. It’s important to avoid holding the nozzle on one spot for too long, you can damage your cleats by doing that. You should just move the hairdryer slowly around the surface of the shoe, the heat will help it to stretch out.
After you finish with the heating, keep your cleats on and walk around for 20 to 30 minutes.
On the other hand, the steaming trick is mainly addressed to soccer teams or professional soccer players as it requires expensive equipment such as the cleatPRO steamer.
Using a Shoe Stretcher
This little device can help you avoid some of the troubles that come with breaking in your soccer cleats. There are many different kinds that can be purchased, some help with the shoe’s sides and some make more space for the toes.
A shoe stretcher is very simple to use. Just put it in your shoe and adjust it so it stretches out the areas you find problematic. It should be left inside the cleat for 24 hours.
Final thoughts
These were the main tricks that you can use in order to make the break-in process as smooth as possible.
Remember to always have an extra pair of shoes with you when you are wearing brand new soccer cleats just in case you feel any discomfort.
If you have any other method that helped you feel free to share it in the comment section right down below.


